How To Repair The Waldorf blofeld No Sound Problem
If Your Warranty Has Expired
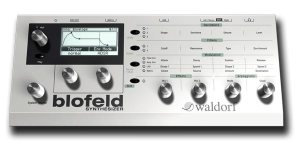
The Waldorf blofeld is a great little synth. It incorporates the wavetable synthesis of the Wave and Microwave series and the virtual analog technology of the Q series, but at a much more affordable price. It has wonderful selection of filters and even has a filter modeled after the classic PPG filter. You can’t go wrong with one of these little synths, absolutely amazing.
However, some users have reported a fault that can develop with the blofeld. It that after some time the audio output on the stereo outputs reduces to a whisper and the headphone output has no sound output at all. If that has happened to your Waldorf blofeld and your warranty is still good then contact Waldorf and have them repair it for you. But what if your warranty has already expired? What if you bought your blofeld used with no warranty? Some users who bought their Waldorf blofeld synth used found little support from Waldorf. Well, all is not lost. There is a fairly easy way to repair it and get your Waldorf blofeld working perfectly again. The guys at Synth Talk have just published an article on how to do the repair.
This repair does involve opening up your Waldorf blofeld and doing a little soldering to replace a faulty part. So if you are not comfortable with soldering then get somebody with experience to do it for you.
Also if your Waldorf blofeld is still under warranty then please contact Waldorf and have them repair it for you. Doing this repair by yourself will definitely void your warranty. So again, if your Waldorf blofeld synth is still under warranty please do contact Waldorf.
First open up your Waldorf blofeld by removing knobs on the front panel encoders, remember to pull them off gently and straight up, don’t wiggle them. Next remove the 4 screws on the back cover. Be sure to keep all screws and parts that you remove in a safe place, in separate dishes or containers for example, while doing the repair.
Next remove the main circuit board. Remove the 3 screws and 4 screw posts that hold the blofeld’s main circuit board in place. The power connector is a snap in device and will need to be taken out in order to remove the circuit board. You can either leave it attached to the circuit board and just remove it from the casing or desolder the wires connecting it to the circuit board and remove it from the case completely. That takes more work but it does allow you more freedom of movement with the circuit board. Then gently remove the board holding it by the edges. Don’t force it out, be gentle.
Next turn over the circuit board of your Waldorf blofeld and find the part that needs to be replaced. It’s a tiny SMD fusible resistor that is located just below the Shift button. You will need to remove the damaged part by heating it with your soldering iron and sliding it off. Heat both sides of the resistor alternately until the solder melts and slide or lift it off the board with a pair of tweezers.
Next solder the new part. Clean up the area where you remove the old part and remove any excess solder on the pads with solder wick. Then apply a small amount of solder to one pad. Line up the new resistor with the pads on the board and make sure it is flat against the board. Touch your soldering iron to the solder on the pad and heat it until it flows onto the lead of the resistor. You should only apply heat for a few seconds. Make sure the resistor is properly lined up and flat against the circuit board and then solder the other side. You want a nice fillet type joint not a bi glob of solder stuck on the resistor lead. Finally reheat the first side again allowing the solder to flow into the joint.
Allow everything to cool down and then reassemble your Waldorf blofeld and check to make sure it is working properly again and you have full audio on all outputs.
You can read the full article on how to repair the Waldorf blofeld no sound problem
which goes into the procedure in much more detail at Synth Talk.
